Chapters
Navigate to chapter
► Chapter 1: Designing Your Aquarium Habitat
► Chapter 2: Populating Your Saltwater Tank
► Chapter 3: Overview of Saltwater Tank Care
► Chapter 4: Saltwater Fish Health
Chapter 1: Designing Your Aquarium Habitat
It’s almost a given that a saltwater aquarist will get bitten by the “bigger is better” bug. Certainly more tank space will allow you to keep a greater variety of larger fish and other aquarium inhabitants. It’s a mistake, however, to think about tank size first, without considering exactly where the aquarium will be placed, and what type of tank you want to cultivate.
Weight is a Primary Consideration
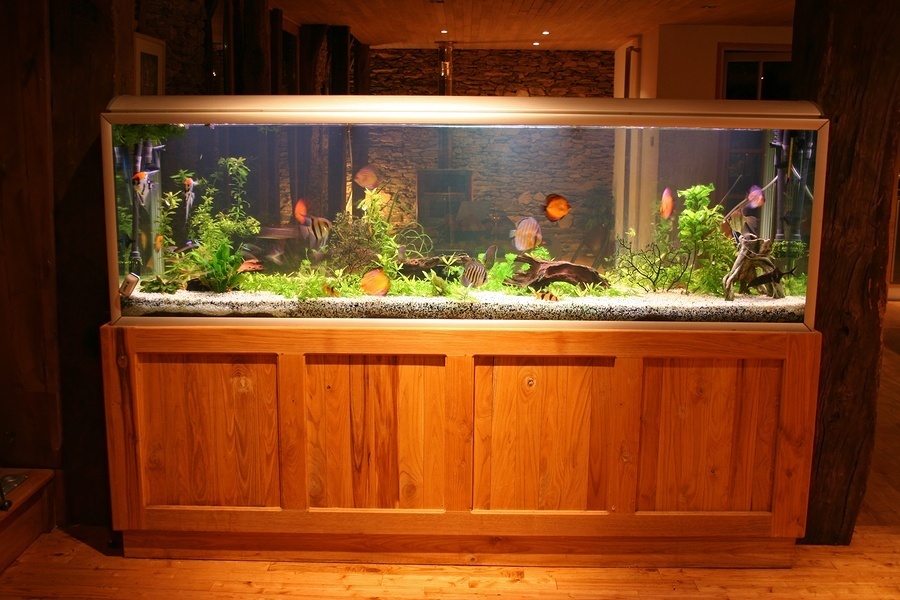
It is important not just to think in terms of the volume of your future tank, but what that volume translates to in terms of weight. Let’s consider a 180 gallon (681.37 liter) tank with dimensions of 6’ x 2’ x 2’ (1.8m x 0.6m x 0.6m).
As a standard rule of thumb, you can stock 1 inch (2.54 cm) of adult fish per 5 gallons (18.9 liters) of water. Depending on the size of fish you pick, you have 36 inches (91.44 cm) with which to play. That’s more than enough room to create an interesting environment.
You could easily stock your tank with:
8 Green Chromis
(1-2 inches / 2.54-5.08 cm)
Total: 8-16 inches / 20.32-40.64cm
2 Pearlscale Butterflyfish
(2-3 inches / 5.08-7.62cm)
Total: 4-6 inches / 10.16-15.24cm
1 Coral Beauty Angelfish
(2-3 inches / 5.08-7.62cm)
Total: 2-3 inches / 5.08-7.62cm
1 Pacific Blue Tang
(2-3 inches / 5.08-7.62cm)
Total: 2-3 inches / 5.08-7.62cm
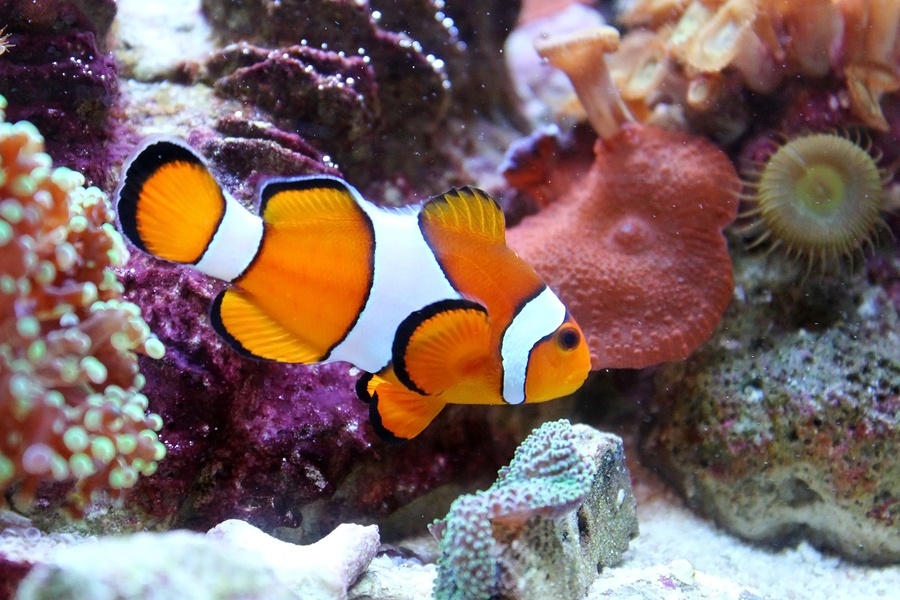
1 Clownfish
(1-3 inches / 2.54-7.62cm)
Total: 1-3 inches / 2.54-7.62cm
Tank Total: 17-31 inches / 43.18-78.74cm
Truth be told, most tanks are always just a tad overstocked, so you could throw in a few more small fish.
That all sounds great, right? Well, here’s the reality test. Your tank is going to weigh 1,440 lbs. / 653.17 kg.
The bigger you go, the heavier you go. Then you start having to think about your home or office and start asking purely structural questions.
– Will the tank be suitable for a second story?
– Are my floors reinforced?
– Can they be reinforced? (This can even be true of a lower floor.)
– Will the tank have to sit directly on concrete?
It is certainly not unheard of for a saltwater enthusiast to remodel a portion of their home to accommodate a new and larger aquarium, but you don’t want to start out your new hobby by having to hire an engineer and an architect to make it work.
Pick a tank size that can be placed in your existing home or office. Learn everything there is to know about maintaining a saltwater aquarium with that first tank.
Make all your mistakes on a reasonable scale, because making them on an enormous scale gets very expensive very quickly.
Pick a Tank Type
There are three basic configurations for saltwater tanks:
– fish only
– fish only with live rock
– reef
The requirements for setup and maintenance, as well as the potential for stocking the population, vary with each configuration.
Fish Only (FO)
Fish only aquariums are exactly what the name suggests, tanks that are set up to house marine fish as the focal point of the display, often with few decorations beyond replica coral.
They are excellent tanks for people new to marine aquariums, and will allow you to learn about the necessary equipment, water chemistry, and population management.
Fish Only with Live Rock (FOWLR)
The natural progression in this hobby is to start with a fish only tank, and to move up to a FOWLR tank as a bridge toward eventually having a reef tank. FOWLR aquariums incorporate live rock, which are fragments of coral reefs that come with natural colonies of marine life.
This will include invertebrates, sponges, and lots and lots of beneficial nitrifying bacteria. The rock is fantastic secondary filtration and goes a long way toward creating more stable water, not to mention the realistic undersea aesthetic it adds to a tank.
There are, of course, additional considerations for acclimatizing and caring for the live rock, especially in terms of correct lighting and supplements. Additionally, you will have to be more careful not to harm the bacteria by putting any kind of chemicals like medications in the water.
Reef Tank
There are two words typically associated with reef tanks: expensive and challenging. You may have very few fish or none at all in a reef tank, but you will have lots of corals and invertebrates. These creatures are highly sensitive to water condition, so you will face the challenge of maintaining chemically stable water at the highest level.
Corals are photosynthetic. Without the right lighting, they won’t live. Pretty much everything in a reef tank needs special attention, but for the people who keep them, and who thrive on that level of fine detail, there’s no more satisfying kind of tank.
Selecting Your Equipment
When you’ve made a determination on the size aquarium you can handle relative to your home or office, and then chosen a type of tank to install, you can begin to select your equipment. The following is an overview of the major components of a basic marine tank.
Tank Size and Material
We’ve already discussed the factors of size and weight. Go with the largest tank you can afford and house. At minimum for a marine tank, you want to start in the 30-55 gallon (113.56-208.2 liter) range.
With water alone weighing 8 pounds (3.62 kg), you’re looking at a minimum tank weight of 240-440 pounds (100-200 kg). If possible, start at the 180 gallon (681.37 liter) level. This will give you far more options, and will actually be easier to maintain even for a beginner.
(Please note that all of our examples and estimated prices for equipment are based on a 180 gallon / 681.37 liter tank size.)
Estimated Cost:
180 gallon / 681.37 liter tank
$350 / £223
For the most part, the choice of a glass tank over an acrylic one is a matter of personal preference. Glass tanks come in typical rectangular shapes, while custom tanks are frequently made of acrylic to achieve unique shapes.
Acrylic does scratch easily, so all equipment must be rated “acrylic safe.” Glass will crack, break, or shatter if hit with sufficient force, and acrylic is much more durable.
However, glass is the easier of the two to support. If you have an acrylic tank, you must purchase a stand with full-bottom support to prevent bowing or splitting.
Glass is thicker, and tends to distort both position and color. These effects are greatly lessened when looking through acrylic, however, glass is clear, and acrylic does have a tendency to yellow over time.
Protein Skimmer
Protein skimmers create bubbles inside a reaction chamber. Waste materials in the water attach themselves to the bubbles, which rise to the surface and pass into a collection cup where the waste remains. This cup needs to be emptied daily.
In addition to serving a maintenance function, the bubbles are another source of oxygenation, which contributes to a more stable level of pH in the water.
Larger protein skimmers operate more efficiently and thus make your aquarium easier to keep. Always buy the largest skimmer you can afford in relation to the size of your tank.
Estimated Cost:
$350 / £223
Pumps or Powerheads
The devices that circulate water in your aquarium are called either pumps or powerheads.
Your goal is to hit a target “turnover rate” or “flow rate,” which will vary by tank size and type. The number will likely be 6-10 times per hour. Expect to see the capacity of these items listed in terms of gallons per hour (GPH) or liters per hour (LPH).
Unless you are housing species that might be sensitive to too much flow in the water, it’s generally best to err on the side of more water movement.
(As you come to understand the design of saltwater tanks, you’ll see the advantages to greater water movement.)
Estimated Cost:
$100-$500 / £63.71-£318.58
Salt
This is, obviously, an ongoing expense. Five gallons (18.92 liters) of salt will make approximately 150 gallons (567.81 liters) of saltwater.
(Note, you always mix the water outside the tank and add it. Remember, you can add more salt in, but once it’s in the water, you can’t take it out.)
Estimated Cost:
$50-$75 / £31.85-£47.78
Reverse Osmosis De-Ionization
The Reverse Osmosis De-Ionization (RODI) unit purifies the water for use in a saltwater tank with a degree of efficiency well above any de-chlorination product.
The unit neutralizes the chlorine in tap water while also removing nitrates and phosphates (among other impurities) that are present due to fertilizers, pesticides, and even pharmaceuticals in groundwater.
If fertilizing elements are not removed, the water will promote excess algae growth. Algae are especially problematic if there are too many nutrients in the water, because the lights used in marine tanks are very bright.
Obviously the other potential contaminants are unhealthy for fish, even if they are — somewhat dubiously — considered safe for human consumption.
Exceptionally pure water is also necessary for the cultivation of coral, and for the health of any invertebrates in your aquarium.
RODI takes place across a five-step filtration sequence:
– The sediment filter removes large impurities like dirt and rust.
– Two carbon blocks take all traces of chlorine out of the water.
– The RO membrane rejects 96-98% of the total dissolved solids present in the water.
– The DI cartridge injects positively and negatively charged ions into the water
The final result is 0 TDS water, which will show no detectable electric charge on a TDS meter. If there were still impurities in the water, electrical conductivity would be evident.
Estimated Cost:
$150-$250 / £95.57-£159.29
Lighting
Proper lighting is a major element of aesthetic tank design and a matter of considerable debate and opinion. The older style 50/50 bulbs with an actinic element create a desirable “blue” appearance to the water, but the newer LED lights are more energy efficient, produce less heat, and add “shimmer.”
Since there is no real “right” answer, (unless you’re raising coral) your best bet is to look at tanks with different kinds of light and decide which you like best and which fits your budget.
Due to the potential price range, you should budget a great deal more for lighting than you might expect.
Estimated Cost:
$250-$500 / £159.29-£318.69
Substrate and Rock
Micro and macroscopic organisms inhabit “live” rock, which may be one of several types. Assuming that you are starting with a “fish only” aquarium, live rock will not be an issue, but you should understand the term. It’s quite common for saltwater hobbyists to progress to keeping a reef tank.
– coral
Pieces of coral or coral rock that have broken off the edges of reefs and are encrusted with such things as coralline algae and sponges.
– inshore rock
Rock taken from inside a reef that is much more densely covered in organisms like shrimp, crab, mussels, and macroalgae (seaweed).
– dead base rock
Rock that has no population of living organisms and that is used to serve as a base on which to place and arrange living rock. Over time, the living rock will seed the base rock.
Typically fine sand is used to cover the bottom of a tank. In fish only tanks, it’s common to use base rock and some combination of artificial coral to create the desired natural look.
Estimated Cost:
(live rock) 25 lbs. (11.33 kg) $75-$100 / £47.78-£63.74
dry sand (varies by type and color)
approximately $37 / £58 per 30 lbs. / 13.6 kg
Heaters and Chillers
In order to maintain the correct temperature in your tank, you may need a heater, a chiller, or both. Much of this decision lies in where the tank is located in your home or office and how much you can control the climate of the building.
Insulating your tank can improve your ability to regulate temperature, and is also a more energy efficient strategy in terms of required electricity. Both heaters and chillers do use a fair amount of power.
Estimate cost:
heater $200 / $128
chiller $500 / £319
(Note that while there may be some areas of your equipment choice where you can cut a few corners, climate control is not one of them. It is essential that you maintain a stable temperature in your saltwater aquarium.)
As a standard rule, the more water in your tank, the more heat it will retain. Just think about how long a bath tub full of water will stay hot, as opposed to how quickly a cup of coffee cools.
Of the two units, an aquarium cooler will have to work the hardest, so if cooling is your primary climate control need, put the greater part of your budget there.
Equipment to Monitor Water Quality
Although it’s not necessary to be a chemist to maintain water quality in a marine tank, you will be testing the water regularly. The primary tool you will use to measure salinity is called a refractometer.
Estimated cost:
$150 / £96
You will also need chemical testing kits for such variables as ammonia, phosphates, and nitrates among others.
Estimated cost:
$20-$40 / £12.75-£25.51 per kit
As an alternative to this approach, however, more and more aquarists are opting to monitor their tank with computer-based sensors that not only measure the required levels, but also keep a running record of the health of the tank.
The beauty of this approach is that the software can even predict an adverse event before it occurs. Considering the high cost of many saltwater fish and other life forms, the software and sensing system can pay for themselves in short order.
If you can afford this approach, you will automatically cut down your tank maintenance time, and will even have the luxury of checking on your system at a distance via your smartphone.
You can precisely monitor such variables as pH, temperature, salinity, and water level and flow among a host of others. The sensor systems are expandable, and growing rapidly in sophistication.
If you are interested in computerized water monitoring, look at the controllers offered at DigitalAquatics.com. Expect to require a custom quote to get an accurate price.
Estimated Cost:
$500-$1000 / £319-£368
Sump
Essentially a sump is a second tank that is linked to the main tank. Its purpose is to hold a reserve pool of pre-conditioned water.
This is not a necessity, but many aquarists argue that by doubling the total water volume in the tank environment, you will be able to run a healthier aquarium with better water flow and filtration.
Commonly the sump will be designed to sit hidden beneath the main display tank along with other necessary parts of the tank’s mechanical systems. Prices will vary by size and water capacity.
Estimated cost:
$280 / £179
Auto Top Off
This system is designed to maintain the water level in the tank with fresh water when evaporation drops the level to a predetermined point. The design is fairly basic.
A float lowers with the water level and triggers a pump when the set point is reached. Then the water rises, a second trigger shuts the pump off.
Estimated cost:
$175 / £112
Backup Generator
While a backup generator is not a necessity, having one does make sense when you add up your total investment in a saltwater tank in terms of both equipment and livestock.
One power failure, and all your work — not to mention the lives of your fish — are snuffed out in just a few hours.
Estimated cost:
7500 watt stand-by generator
$700-$1000 / £447-£638
Overflow Box
An overflow box also belongs in the category of “precautionary equipment.” If something goes wrong and an excess of water is pumped into your tank, the overflow box would prevent water damage to the adjacent area.
Estimated cost:
$150 / £96
Installing Tank Components
While there is no one way to set up a saltwater tank — or any aquarium for that matter — the typical sequence runs along these lines.
– Select and purchase a tank in terms of size and material.
– Determine the location of the tank and how it will be supported. (Stand, reinforced flooring, or concrete.)
– Connect the RODI system to ensure water quality from the beginning.
– If you are planning to use a sump, install that tank and ensure the quality and consistency of the water it will hold.
– Mount the protein skimmer, auto top off system, and heater / chiller as applicable.
– Lay down the substrate and position any rock, live or artificial, along with additional aquarium structures and decorations.
– Mount the powerheads or pumps.
– Fill the tank with premixed saltwater but do NOT add fish.
It is absolutely essential that the water in your aquarium be “cycled” before any fish are introduced. This is a time consuming process, but vital to sustain marine life.
Be prepared for the fact that your new tank may well sit empty for a period of 6-8 weeks before you can begin to introduce fish.
Understanding Basic Water Chemistry
Like any hobby, aquarists have their own “lingo” and their own pet topics. When groups of saltwater enthusiasts gather, water quality is a source of almost endless debate and analysis. This is not, however, a topic to be taken lightly.
Maintaining good water in your tank means you are responsible for the very atmosphere your fish breathe. The fastest way to kill an entire tank is to ignore their water until it becomes nothing more than a toxic ammonia soup.
The essential measurements with which you will become conversant include:
– pH (power of hydrogen)
An expression of the acidity of water measured on a scale, with ph 5 being slightly acidic and pH 8 alkaline. The neutral position is pH 7. Saltwater has a pH range of 7.5 to 8.4.
– KH (carbonate hardness)
This is not a measure of alkalinity, but rather a measure of how alkaline the water is, meaning, how well will it serve as a buffer to neutralize acid. The higher the KH, the more stable the chemical composition of the water.
– sg (specific gravity)
This reading shows the relative salinity of the water, which is measured with a hydrometer or refractometer. Natural seawater varies in salinity by location from 1.020 to 1.030. Saltwater tank enthusiasts generally strive for a reading of 1.022.
Water Parameters by Tank Type
The basic parameters that are applicable to each type of tank (along with more advanced readings) are:
specific gravity or salinity:
1.020-1.025 for FO and FOWLR, 1.023-1.025 for reef
temperature:
72-78 F for all
pH:
8.1-8.4 for all
alkalinity:
8-12 dKH for all
ammonia:
undetectable
nitrate:
undetectable.
nitrate – nitrogen:
less than 30.0 ppm for FO and FOWLR, less than 1.0 ppm for reef
phosphate:
less than 1.0 ppm for FO and FOWLR, less than 0.2 ppm for reef
calcium:
350-450 ppm for all
magnesium:
1150-1350 ppm for FO and FOWLR, 1250-1350 for reef
iodine:
0.04-0.10 ppm for FO and FOWLR, 0.06-0.10 ppm for reef
strontium:
4-10 ppm for FO and FOWLR, 8-14 ppm for reef
You will come to know these and other water quality measurements by heart. In the beginning, however, your primary concern is to be certain that the nitrogen cycle is in place in your tank.
Cycling Your Tank
Cycling the tank creates an active process that addresses the amount of ammonia that builds up in the water from the waste material produced by fish in a closed environment.
Ammonia becomes toxic to all the life forms in the tank very quickly. If the correct beneficial bacteria are in place to eat the ammonia, it is converted to nitrite, which is, in turn, eaten by more bacteria and changed to harmless nitrate.
This bacteriological food chain is part of your water quality management routine, and can be established in a number of ways:
– By introducing chemicals to the water.
– By introducing a source of ammonia.
– By using “starter fish” that are, in essence, sacrificial lambs.
– By using live rock.
In the shorthand of the aquarium world, this process boils down to “with fish” and “without fish.”
The traditional way is to use starter fish, and to hope they survive. Damselfish are typically chosen to cycle a tank because they can withstand the toxic levels of ammonia to which they will be exposed with a fair amount of success. Many aquarists, however, balk at what seems like blatant cruelty.
If the “without fish” method is chosen, ammonia must be introduced to the tank in some form, either by chemically adding it to the water, or by putting decomposing matter or fish waste in the aquarium.
The purpose is to cultivate the beneficial bacteria that will start to break the ammonia down into nitrites and ultimately nitrates. The goal is to achieve an environment where nitrates are present at a level below 10 parts per million.
When cycling without fish, raise the water temperature to 86F-95F (30C-35C) until the water stabilizes, then slowly cool it back down to a range of 74F-80F (23.3C-26.6C). You do not want to stress and kill the bacteria you have just cultivated with a rapid shift in temperature.
Estimated Setup Costs
Aquarium
180 gallon / 681.37 liter tank $350 / £223
Protein Skimmer
$350 / £223
Pumps or Powerheads
$100-$500 / £63.71-£318.58
Salt
$50-$75 / £31.85-£47.78
Reverse Osmosis De-Ionization (RODI) Unit
$150-$250 / £95.57-£159.29
Lighting
$250-$500 / £159.29-£318.69
Substrate and Sand
(live rock) 25 lbs. (11.33 kg) $75-$100 / £47.78-£63.74
dry sand (varies by type and color)
approximately $37 / £58 per 30 lbs. / 13.6 kg
Temperature Control
heater $200 / $128
chiller $500 / £319
Refractometer
$150 / £96
Water testing kits
$20-$40 / £12.75-£25.51 per kit
Computer-based water monitoring (optional)
$500-$1000 / £319-£368
Sump
$280 / £179
Auto Top Off
$175 / £112
Backup Generator (optional)
7500 watt stand-by
$700-$1000 / £447-£638
Overflow Box
$150 / £96
Sample Beginner Fish
8 Blue/Green Chromis
$320.00/£200.00
2 Lemon Butterflyfish
$60.00/£38.00
1 Coral Beauty Angelfish
$22.00/£14.00
1 Pacific Blue Tang
$30.00/£19.00
1 Clownfish
$25.00/£6.00
You can set up your saltwater tank for:
Minimum Requirements
$4494.00/£2827.00
Maximum Requirements
$6114.00/£3845.00
Want to read the entire thing?
